Data Import Templates
Configuration > Utilities > Data Import Templates
Data Import Templates are used to configure imports of various customer data into TITAN. After configuration of the import template, use the Job Scheduler to schedule updates.
Data Import Templates Screen

-
Name - search by data import template name
-
Include Inactive - check to include inactive templates
-
Reset - click to reset search parameters
-
Add New Data Import Template - click to add a new template
-
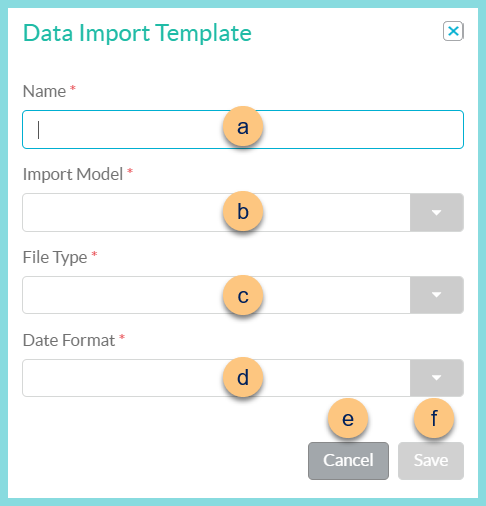
Name - enter template name
-
Import Model - select import model
Direct Certification MatchItem w/ Ingredients
Zip File of Photos - check to indicate that the file is a .zip file. (Note: The zipped photos should each be named as the person identifier.)
Staff
Student
Vendor
-
File Type - select file type (Delimited, Fixed Width)
-
Date Format - select date format (Note: All date fields in the file must use the same date format.)
M/d/yy
M/d/yyyy
MM/dd/yy
MM/dd/yyyy
yy/MM/dd
yyMMdd
yyyy/MM/dd
yyyyMMdd
-
Cancel - click to return to the previous screen without saving changes
-
Save - click to save the template and be redirected to the individual template screen
-
-
Name - click to sort by name
-
Import Model - click to sort by import model
-
Active - click to sort by active status
-
Pencil - click to be redirected to the individual template screen
-
< > - click to scroll through pages
The following templates exist by default:
-
Item w/ Ingredients
-
Vendors
Individual Import Screen
-
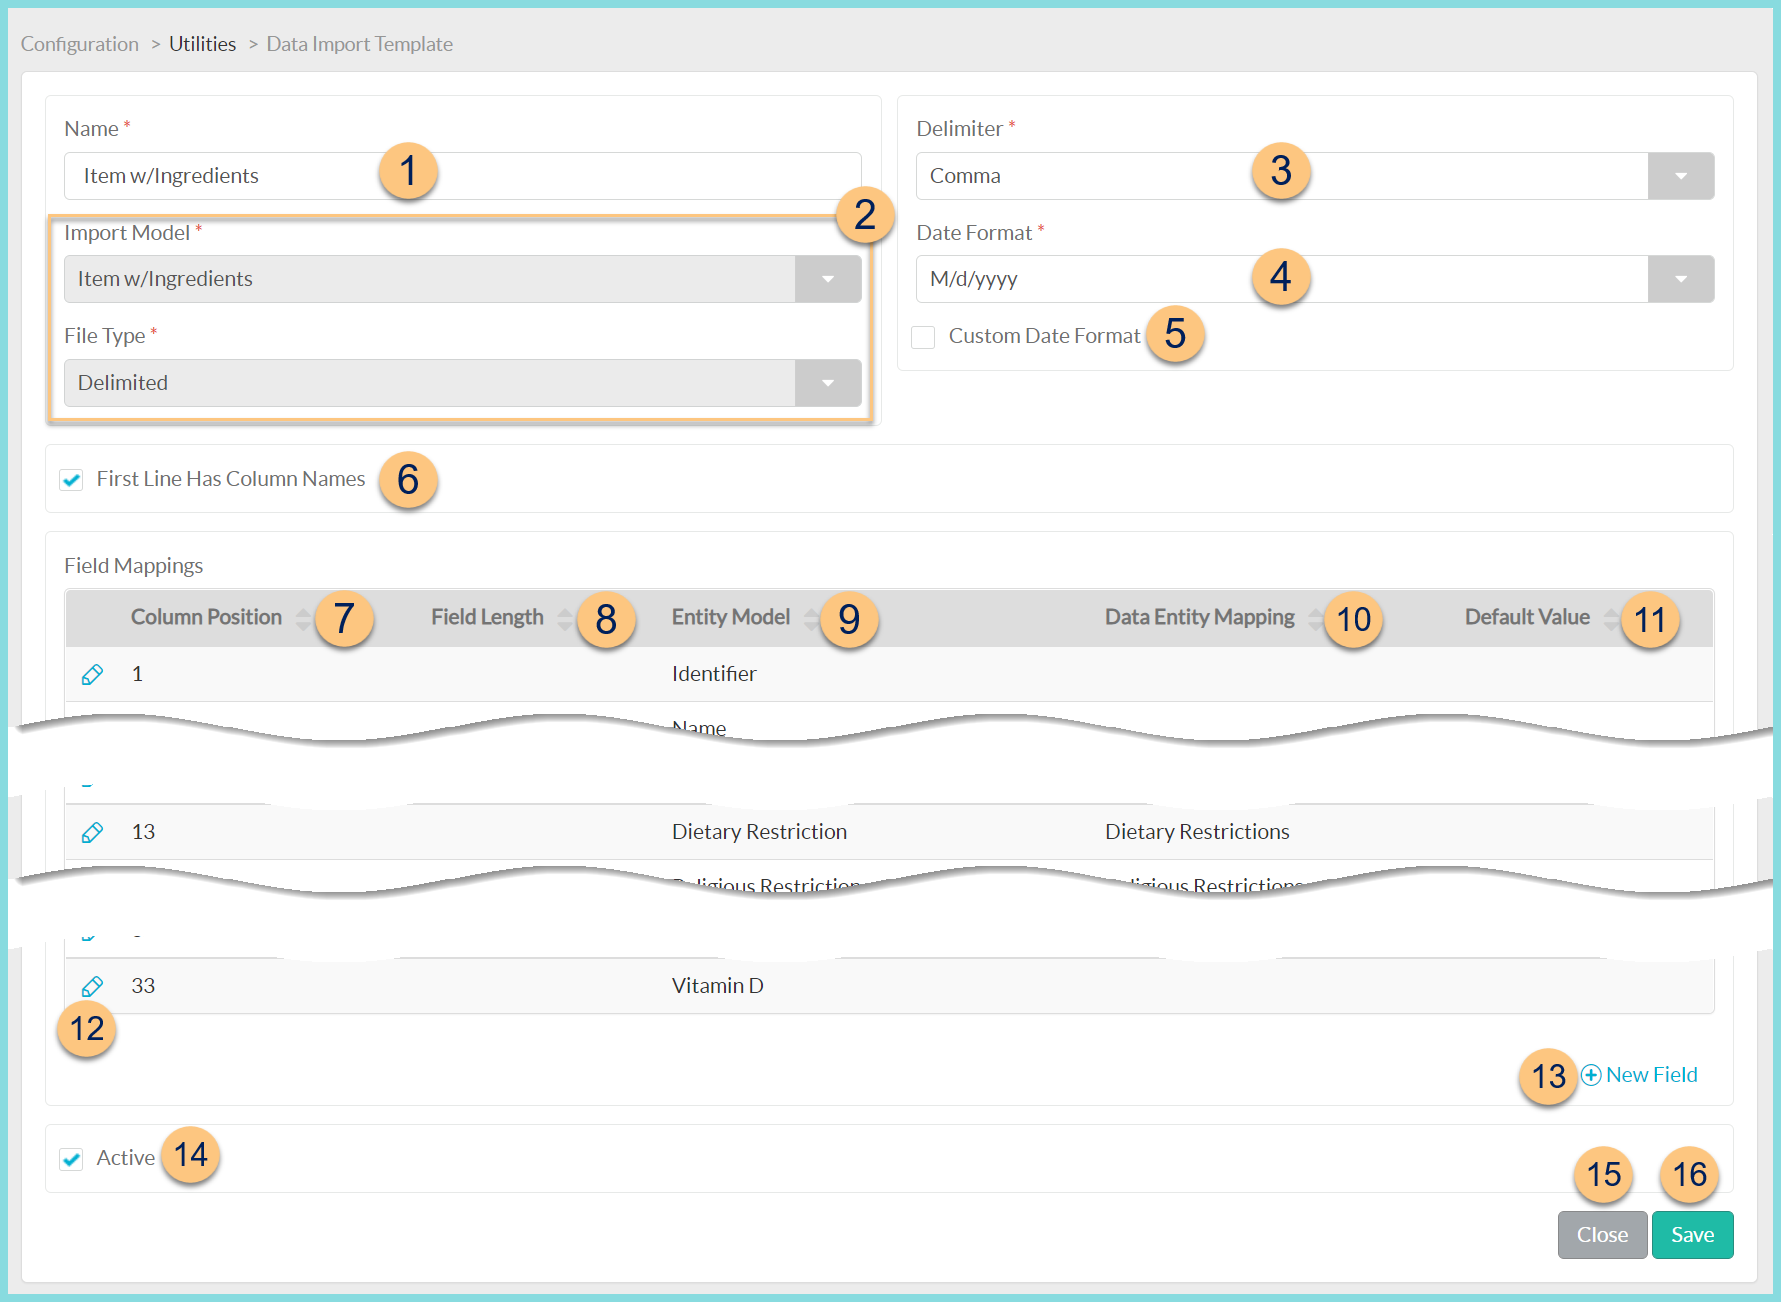
Name - change name of template if needed
-
Import Model, File Type - notice the import model and file type (uneditable)
Match By (not pictured, Direct Certification File Type Only) - select criteria to determine a match
Person Identifier (default)
State Identifier -
Delimiter (delimited file type only) - select delimiter
Comma (default)
Carat
Tab -
Date Format - change date format if needed
-
Custom Date Format - check to type a custom date format
-
First Line Has Column Names - check to indicate that the first row of the import file contains column names and not data to be imported
Drop Students Not In File (not pictured, Student File Type only) - check to end enrollment on students not included in the file (Note: "Yesterday" becomes the enrollment end date.)
-
Column Position - click to sort by column position
Blank - override field
Number - column position of import file -
Field Length - click to sort by length of field (note: Fixed Width file types only)
-
Entity Model - click to sort by selected Entity Model (note: see linked import models above for details on each entity model)
-
Data Entity Mapping - click to sort by selected Data Entity Mapping
-
Default Value - click to sort by the entered Default Value (note: Override or Override if Empty only)
-
Pencil - click to edit field
-
(+) New Field - click to add a new field to the import template

-
Entity Model - select entity model (Note: available entity models vary by import model. Descriptions of each can be found in the linked entity models above.)
-
Default Value Option - select whether to override with a default value
None (default)
Override - choose this option to enter a default value
Override if Empty - choose this option to enter a default value for missing data
Default Value (not pictured, Override or Override if Empty only) - enter the default value
-
Column Position - enter the column number where the data will be found on the import template
Field Length (not pictured, Fixed Width file type only) - enter the length of the field
Data Entity Mapping (not pictured, select Entity Models only) - select the corresponding Data Entity Mapping
-
Cancel - click to return to the previous screen without saving changes
-
Save - click to save changes
-
-
Active - toggle active status
-
Close - click to return to the previous screen without saving changes
-
Save - click to save changes